My
blog 31st July 2018 described the laminated manufacture of the mast.
I deliberately constructed it during the summer months to take advantage of the
warm weather to aid the penetration of the epoxy into the fibres of the timber,
it was then machined square to size and set aside. I have been looking forward
to continuing the process of rounding and finishing along with the manufacture
of the boom, gaff and bowsprit. I first planed down the correct taper in its
square form before marking with a spar gauge then planning off the corners to
form an octagon. I then continued to work it round with the plane and then
abrasive paper on a block with a rotating action when pushing the block along
its length, however, I found it time consuming and considered the results less
than acceptable, I decided that I needed mechanical assistance. My solution was
to manufacture a timber cylinder with a hole bored down its centre to allow a
threaded stud to be inserted, nuts and penny washers were fitted either side to
secure the cylinder allowing an approximate 40 mm projection on one side and
200 mm on the other. I then slid over a length of 15 mm copper tube and secured
it loosely with two locking nuts at the end to allowing free rotation . The
contraption was then secured in an electric drill chuck with the drill speed
set low. I then inverted a sanding belt, thread it over the mast, inserted the
rotating cylinder and applied tension to drive the belt by friction,
unfortunately the belt refused to rotate around the mast but sanded the
cylinder instead! I realised that I needed to increase the diameter of the
cylinder to greater than that of the mast for the rig to work, I therefore
re-constructed the rig with a lager diameter cylinder and tried again. Success,
it worked wonderfully well and I was able to produce a beautifully round mast by
roughing it down with a coarse grade before progressively using finer papers to
achieve a smooth finish.
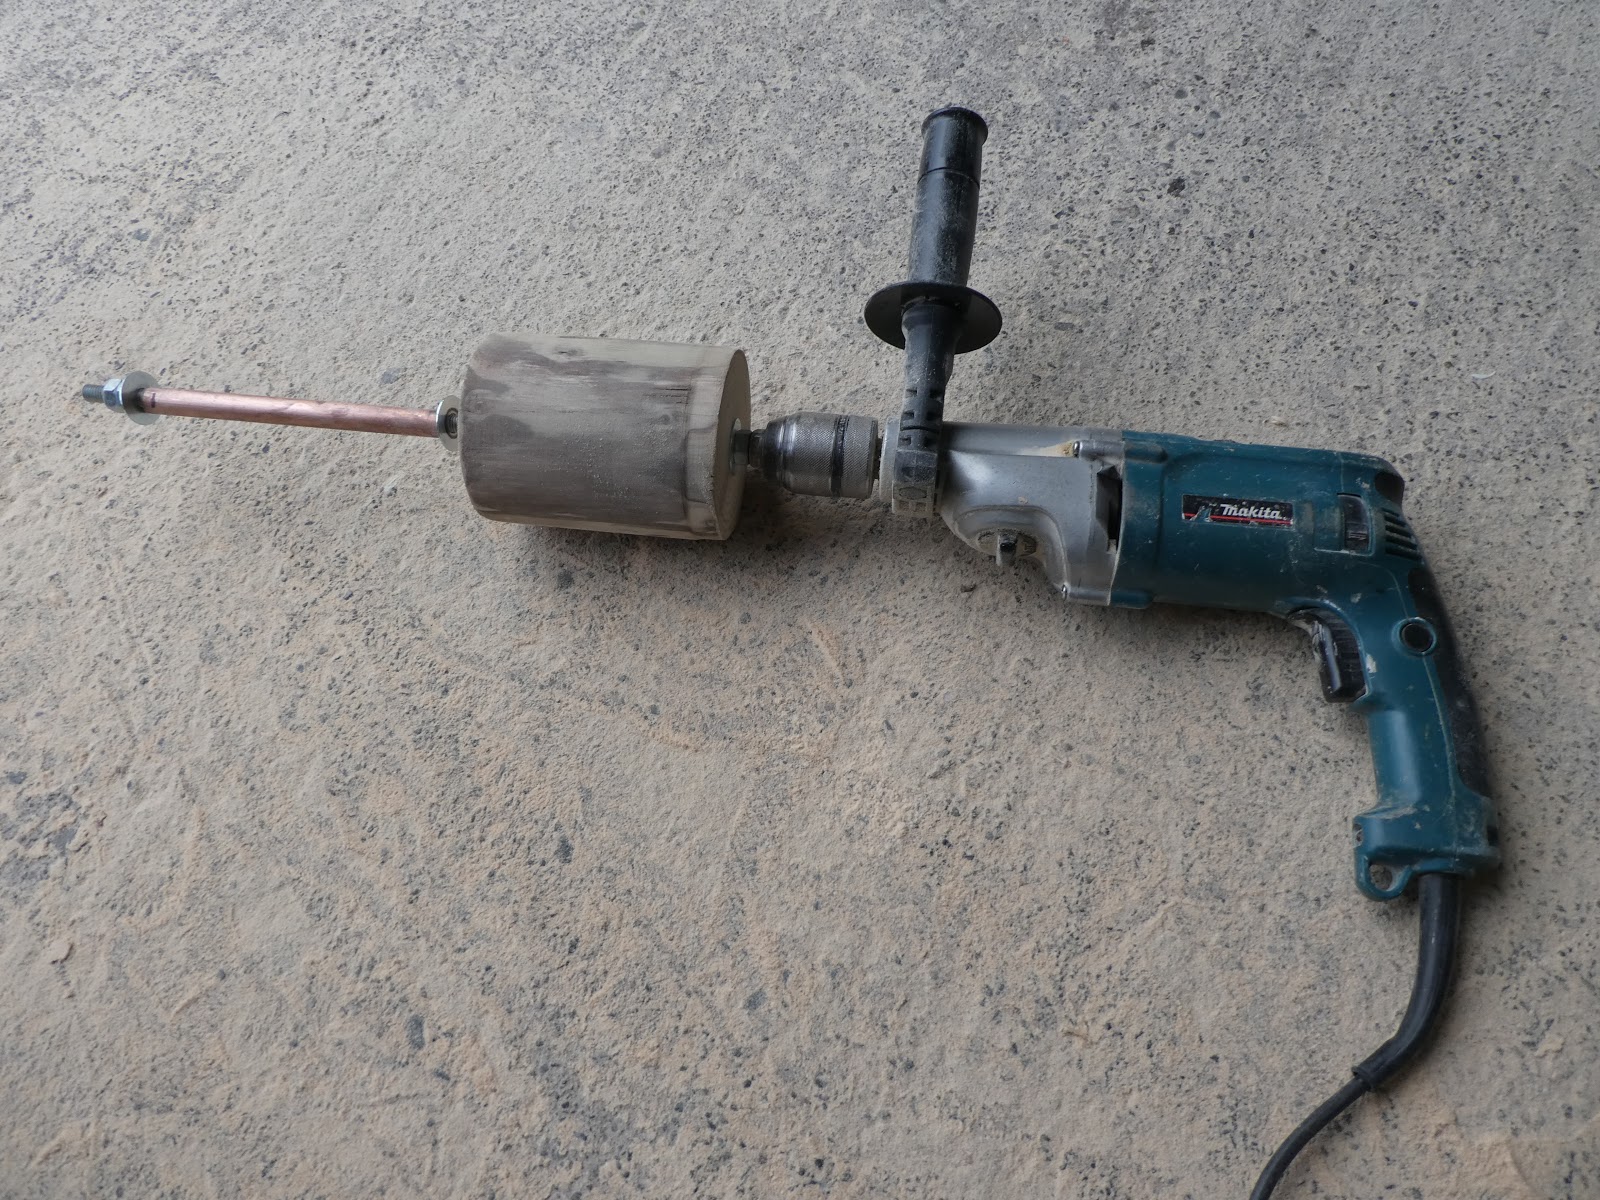
My home made
mast rounding tool.

In action.

Dust flying everywhere, result!
Because
of my intention to fit navigation lights and a VHF antenna, I customised the
head of the mast to accommodate an LED Tri-Colour and antenna bracket. It was
necessary to increase the 50 mm diameter mast head to 90 mm, I therefore made up
two blocks with a half round machined into each face, when glued together they
would then form a 16 mm diameter duct for the cables. In the lathe I turned the
block down to an aesthetically pleasing profile then turned on a 30 mm diameter
spigot and shoulder which would fit in to a corresponding hole bored in the mast
head. The cables were pulled through the whole mast assembly prior to gluing,
due care was taken to ensure that the epoxy did not squeeze out internally
into the duct, therefore preventing potential cable replacement at a future
date.

The two blocks
with half round ducts machined into each face.
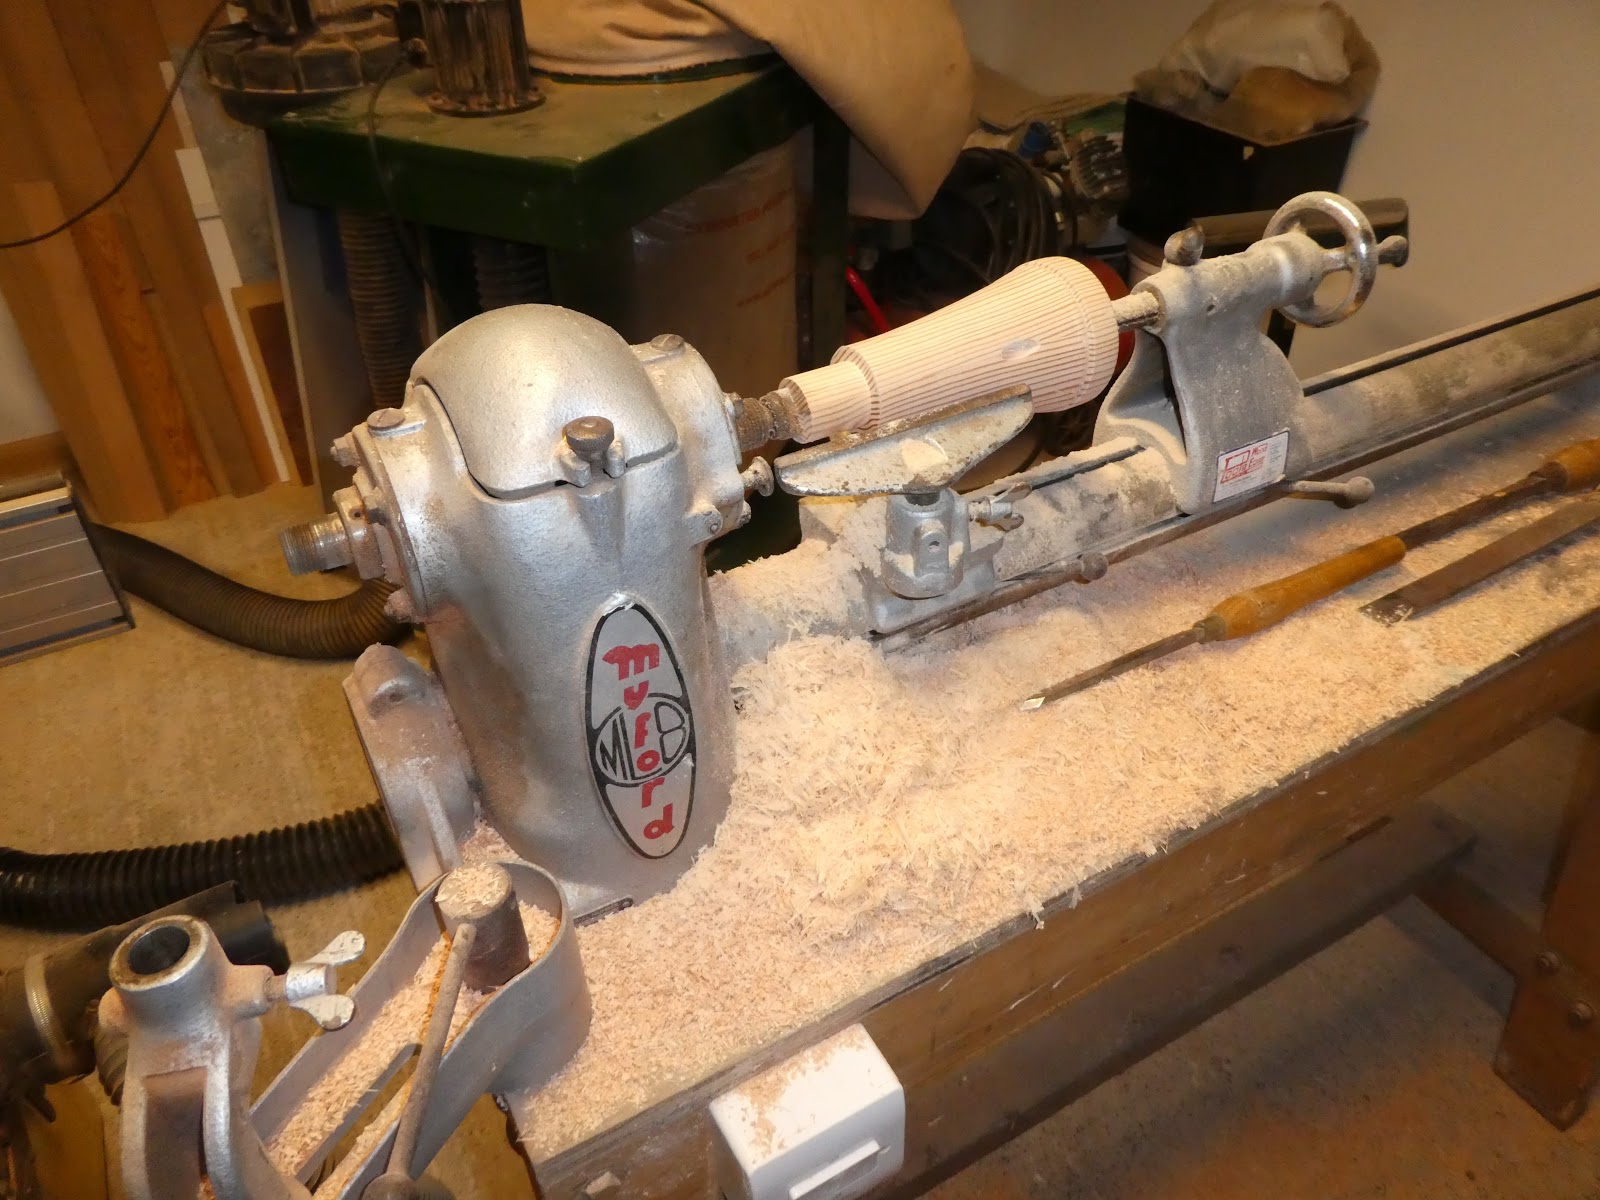
The finished mast head ready for release from the lathe.
The
architects designed masthead incorporates a 10 mm diameter hole drilled through
approximately 40 mm down from the tip, the peak halyard passes through and is
secured by a knot tied in the end. I was unable to adhere to this because of my
cable duct throughout the mast; I therefore fitted an additional two eye mast
hound which also provided me with a potentially useful spare forward facing eye.
Both of these hounds were bedded onto the mast in epoxy mixed with fibres, to
prevent possible rotation, a bronze countersunk screw was inserted either side
of each hound. To prevent potential rotation of the main four eyed mast hound,
I filed half round grooves into the inner face, sheathed around the mast then
bedded the hound in epoxy onto the sheathing.
Because
I have opted for a roller furling jib, the forestay is attached to the mast by
means of a loop which, is prevented from sliding down by a wooden block. I considered that with this design there was a potential for the wire stay to wear
around the mast, I therefore sheathed this area to provide a tougher wearing
surface. I also saturated the base of the mast in epoxy and gently warmed it
through with a heat gun to assist its penetration into the grain; this I hoped
would toughen the fibres of the wood and provide a harder wearing surface
against the steel tabernacle.

The completed mast and spars showing the additional two eye mast hound
VHF antenna
and Tri-Colour navigation/anchor light. The base and the upper
reaches of the
mast above the four eye hound will be painted white,
all other
areas and spars will be clear varnished.

The base of the mast saturated in epoxy, teak cleat fitted to the fore face
for the jib halyard.

The gaff jaws all laminated, clamped up, set and ready for release.

The
manufacture of the gaff jaws was an interesting and enjoyable exercise.
This structure
consumed the last of my home grown ash.

The boom gooseneck.